All clients can manage their settings for flexibility and control of their event. Find more information about how these settings can benefit your event in this article.
About Event Settings #
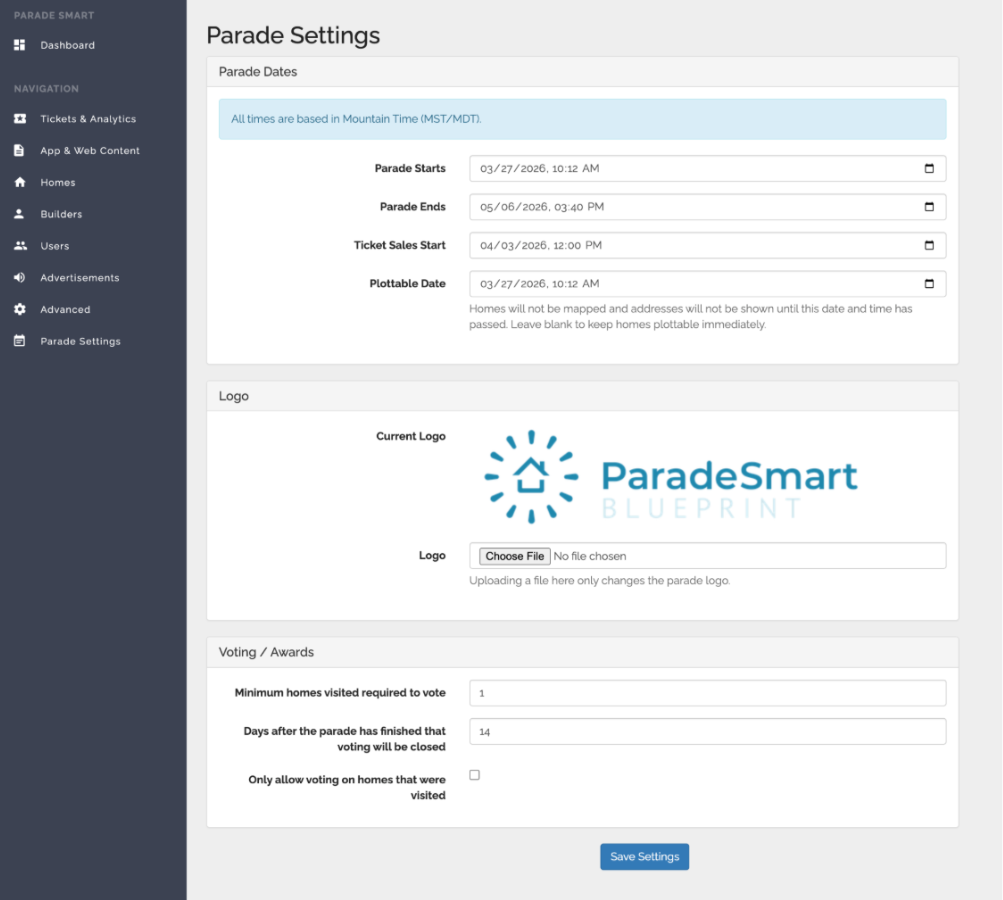
The Parade Settings section allows you to manage important parade details directly from the dashboard. These settings control how your parade appears, when homes become visible, ticket sale timing, voting functionality, and more.
To access these settings, click Parade Settings in the left-hand dashboard sidebar.
Available Parade Settings #
Parade Start & End Dates #
These dates determine when your parade officially begins and ends within the system.
Ticket Sales Start Date #
This setting controls when online ticket sales become available to the public.
Plottable Date #
The Plottable Date determines when homes become visible on the map and when addresses are shown publicly.
If no Plottable Date is set, homes will become visible immediately once published.
This setting is especially helpful for:
- Testing the parade map before launch
- Temporarily hiding homes from the public
- Delaying address visibility until a specific date and time
You can adjust this setting at any time to test your map experience, then change it back when finished.
Logo Upload #
The Logo section allows you to upload or replace your current parade logo displayed throughout the platform.
Uploading a new file here will update the logo in your app and Dashboard.
Voting & Awards Settings #
These settings control how voting and People’s Choice Awards function during your parade.
Options include:
- Minimum number of homes a user must visit before voting
- Number of days voting remains open after the parade ends
- Restricting votes to only homes that were visited
Warning: Important Notes #
- All times are based on Mountain Time (MST/MDT) since ParadeSmart servers are located in Utah.
- Be sure to click Save after making any changes.
- Changes made in Parade Settings update in real time throughout the platform.


